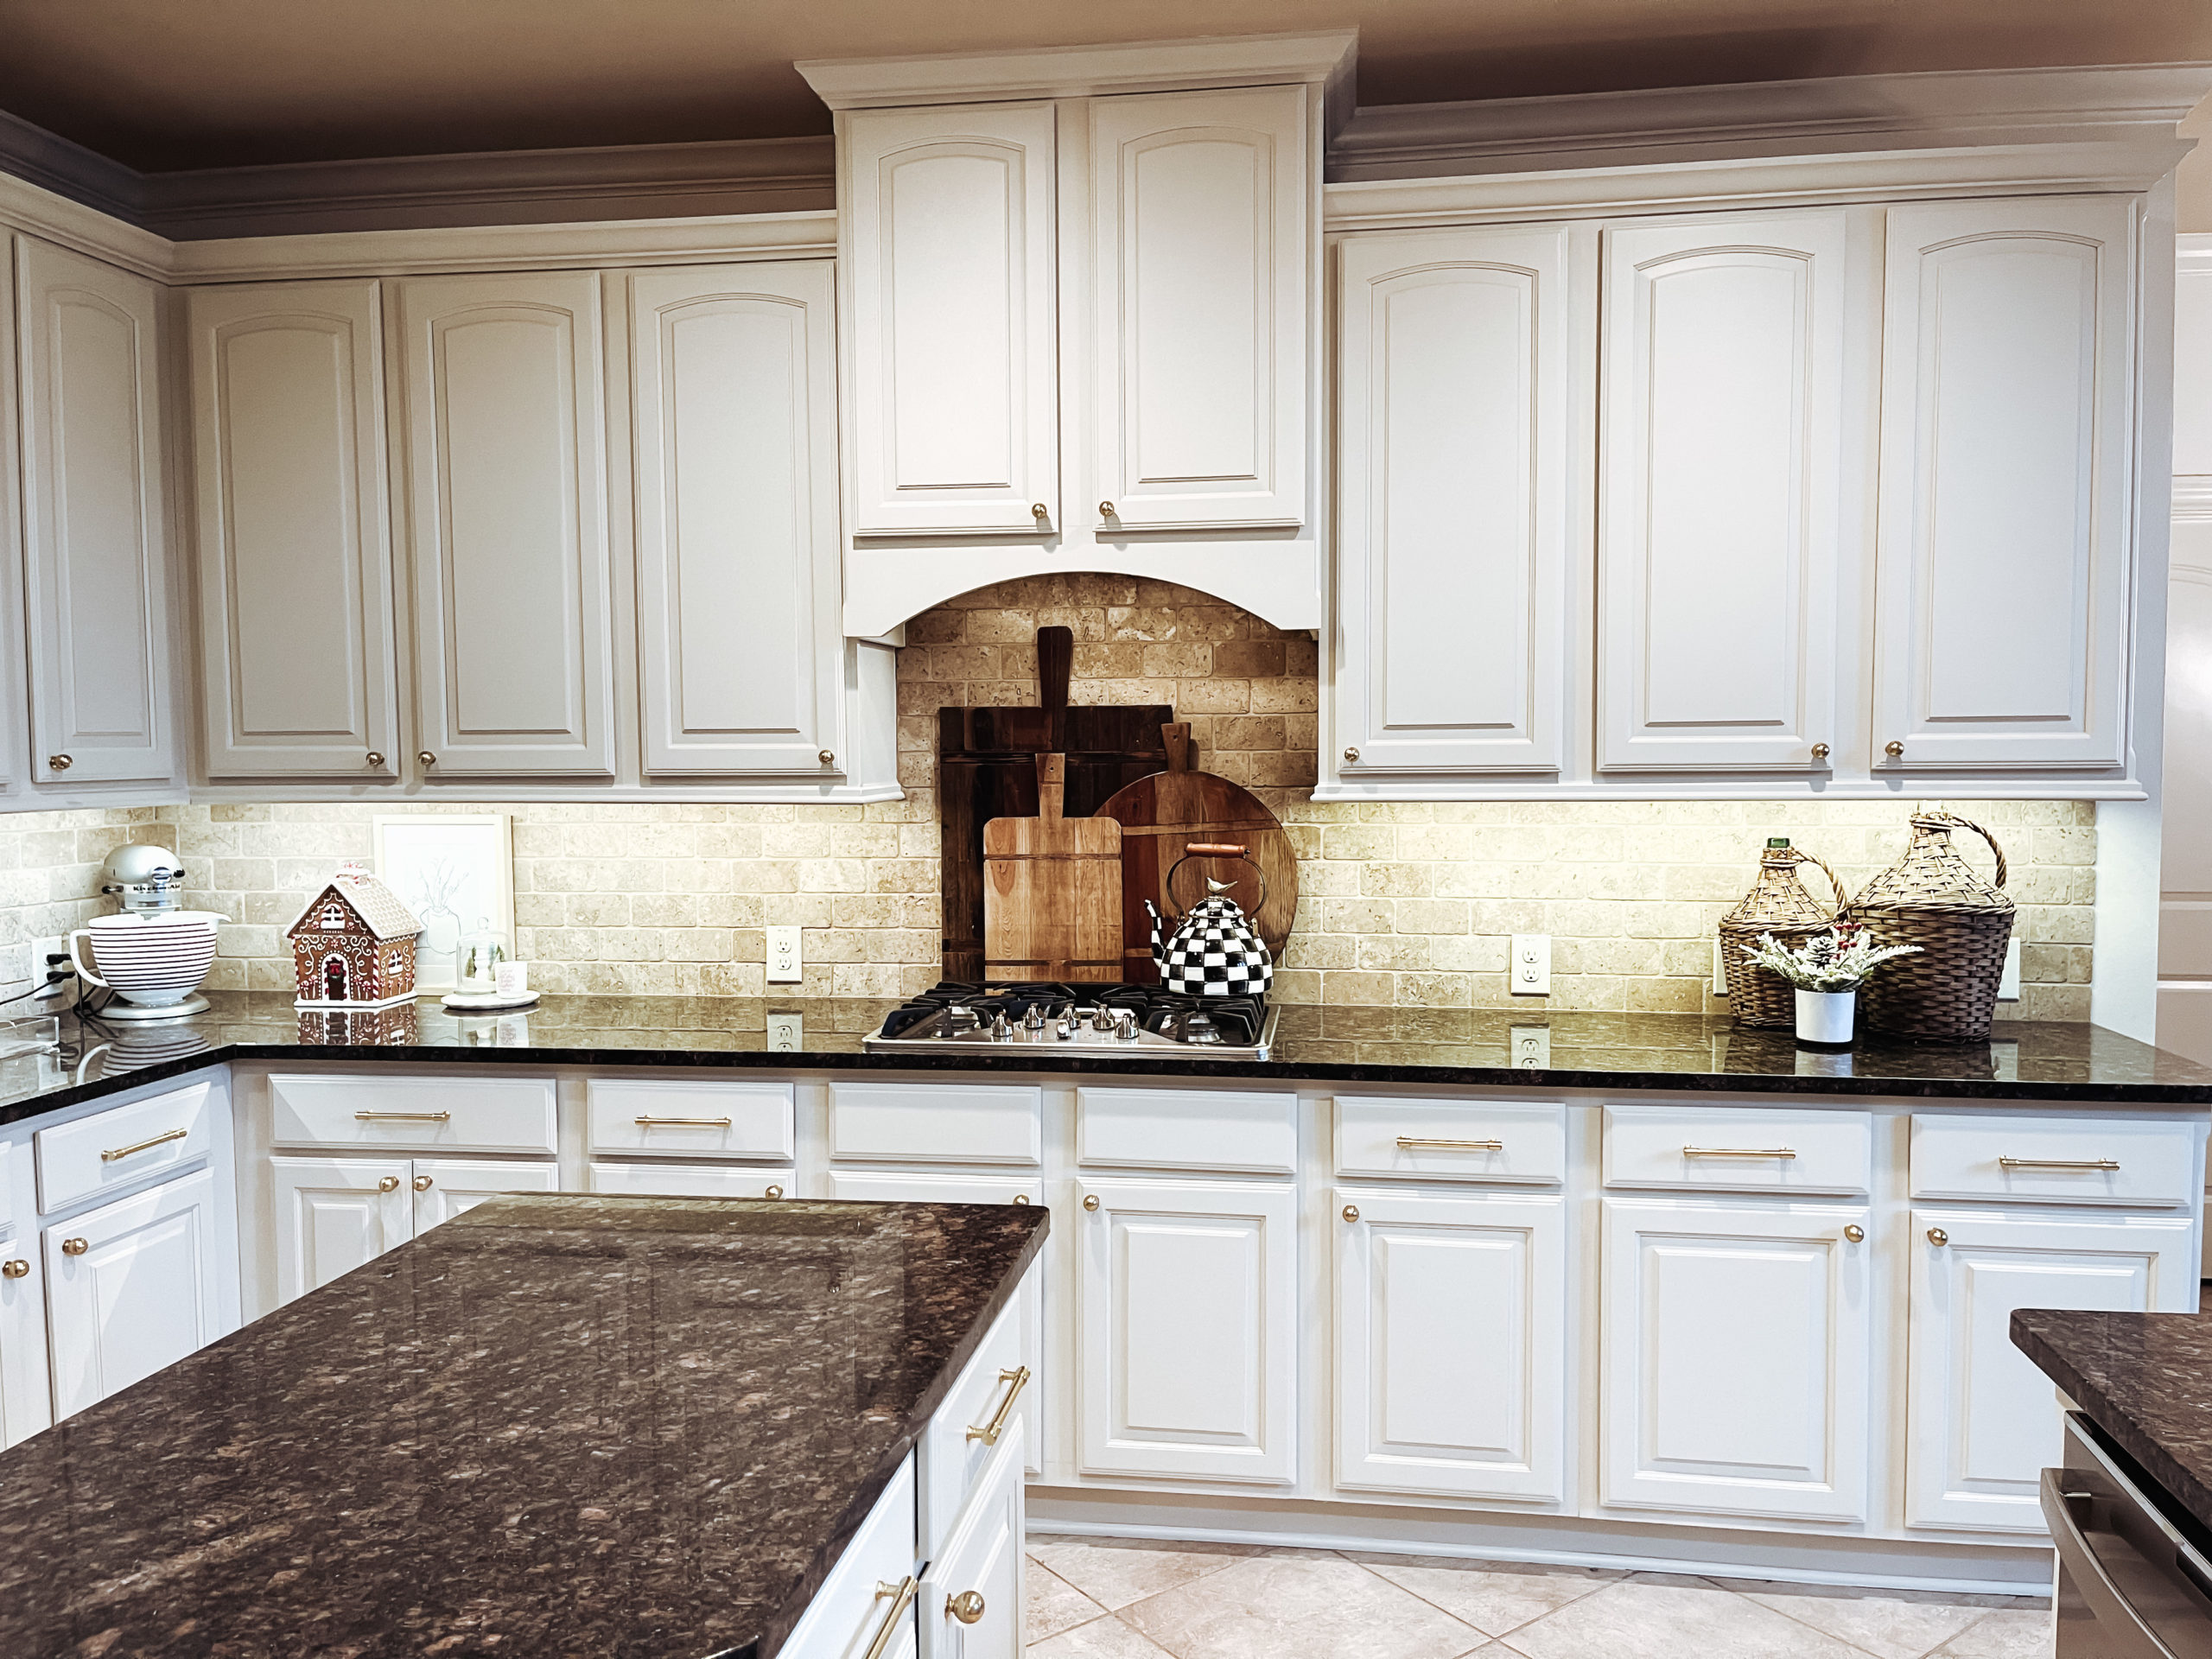

It all started when a reels challenge ended up with a viral reel. Never in a million years did I expect almost 4 million people to view a silly video that I coerced Josh to film with me. So many people chimed in on whether or not we should paint our cabinets. I took a chance and priced out this project as soon as Josh agreed that the internet had spoken and it was time to lighten up the kitchen!
Now, when we first moved into this home, I loved the cabinets but hated that they were paired with the dark granite. We both agreed that we would replace the granite when we built our outdoor kitchen. However, we started to realize that the finish on our cabinets was looking worn and it was time to tackle this project.
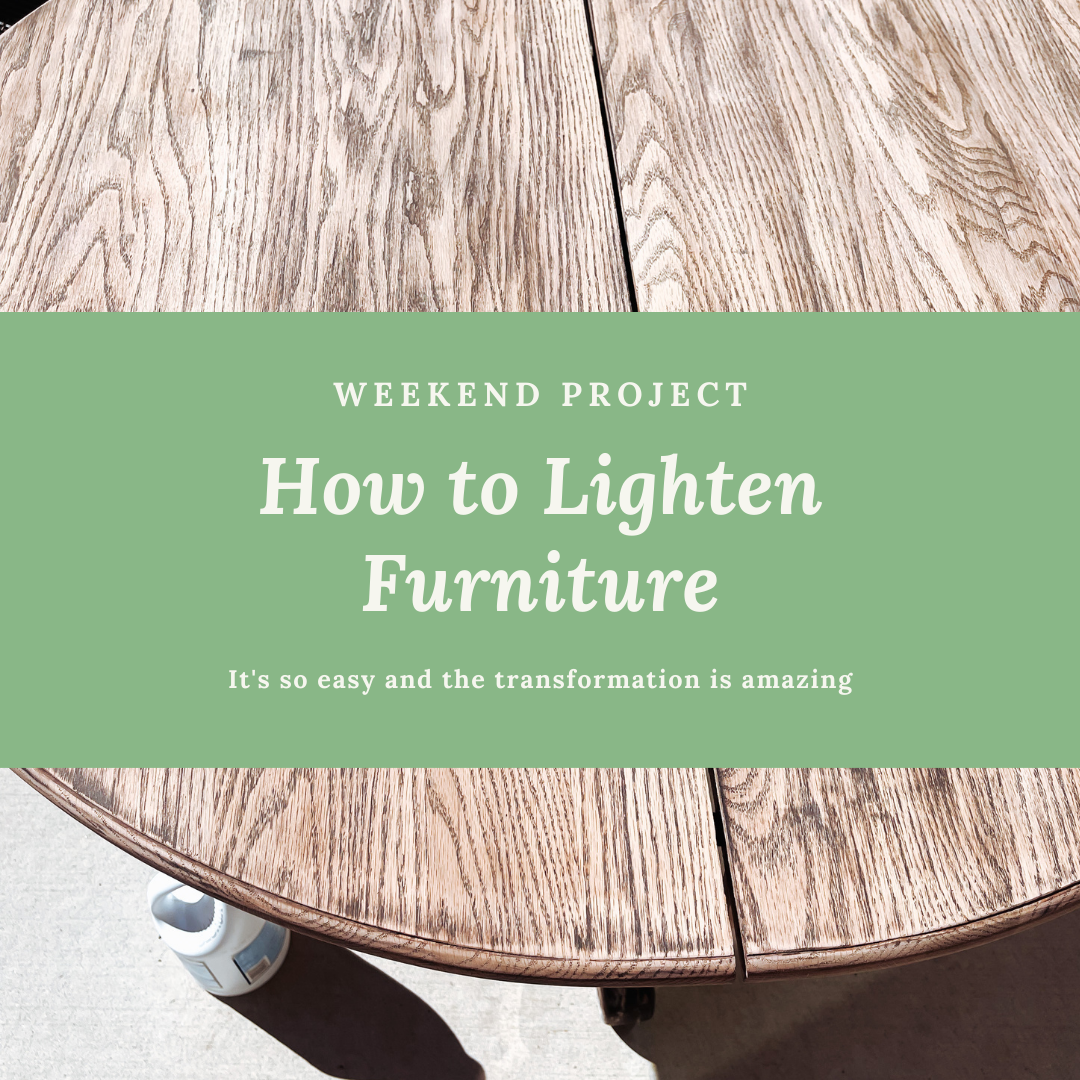
I knew I wanted light cabinets, however, I didnt want bright white. Due to the neutral backsplash and warm whites already on our walls (details here), finding a complimentary color for the cabinets was a little bit of a challenge (but not impossible). My first choice was Benjamin Moore Creamy White or Natural White. Those blended in with our BM Navajo White walls and SW Navajo White moulding. I made several trips into our local Benjamin Moore PDS Paint Center to grab paint samples. We ended up going with the color Clay Beige and I am in love with how it turned out!
The Process:
- We took off all of the cabinet and drawer fronts and wiped down every surface with a TSP Substitute and Scotch Brite Pads. You want to remove any dirt/grease along with creating a rough surface. We ended up doing this step twice to make sure that we didn’t have any issues down the road. Sand down any imperfections and drips in between coats.
- Next we taped off the cabinets, floors and created a paint booth around our room. This was probably the MOST TEDIOUS part of the entire project. It took us a solid week of evenings to tackle this part and make sure that the insides of the cabinets, floors, granite and ceilings were covered to prevent any over spray.
- It’s time to spray primer! We opted to invest in this airless spray system since we have several other big projects that will require one. If this is your only project, renting one may be the most cost effective. You are going to need a paint suit + respirator for painting. Trust me, we had to toss our paint clothes and had over spray in our hair for a week before we made a trip to Lowe’s for paint suits! Lesson learned! As for the primer, we opted for a fast drying alkyd resin primer (Insl-x Prime Lock Plus) for its durability and smooth finish. With the spray gun, we only had to apply one even coat of primer.
- Paint! After allowing the primer to dry/cure for 24 hours, it was time to spray our cabinets! We opted for a water-based paint for the fast drying/curing time. Once our interior was sprayed and we were able to access our kitchen again, we opened our kitchen back up for business and created a paint booth in our garage to tackle our cabinet and drawer fronts. This part took the longest! We had to work around our work schedules, weather and humidity.
- Install hardware! I wanted this investment to have a timeless and traditional feel. I opted for an aged brass finish and went with a classic ball cabinet knob and a 6″ pull for the drawers and love the traditional feel that this hardware gives to the space.
Was doing this project worth it? Absolutely! Despite the extra time it took us to complete by tackling the project in our free time, we saved a ton of money! Even after splurging on higher end pulls/hardware, we still came in thousands under budget vs. the estimate we received for a professional to do it for us. Josh and I both love how it turned out and how much happier we feel when we walk into the room!